
Answer-first summary
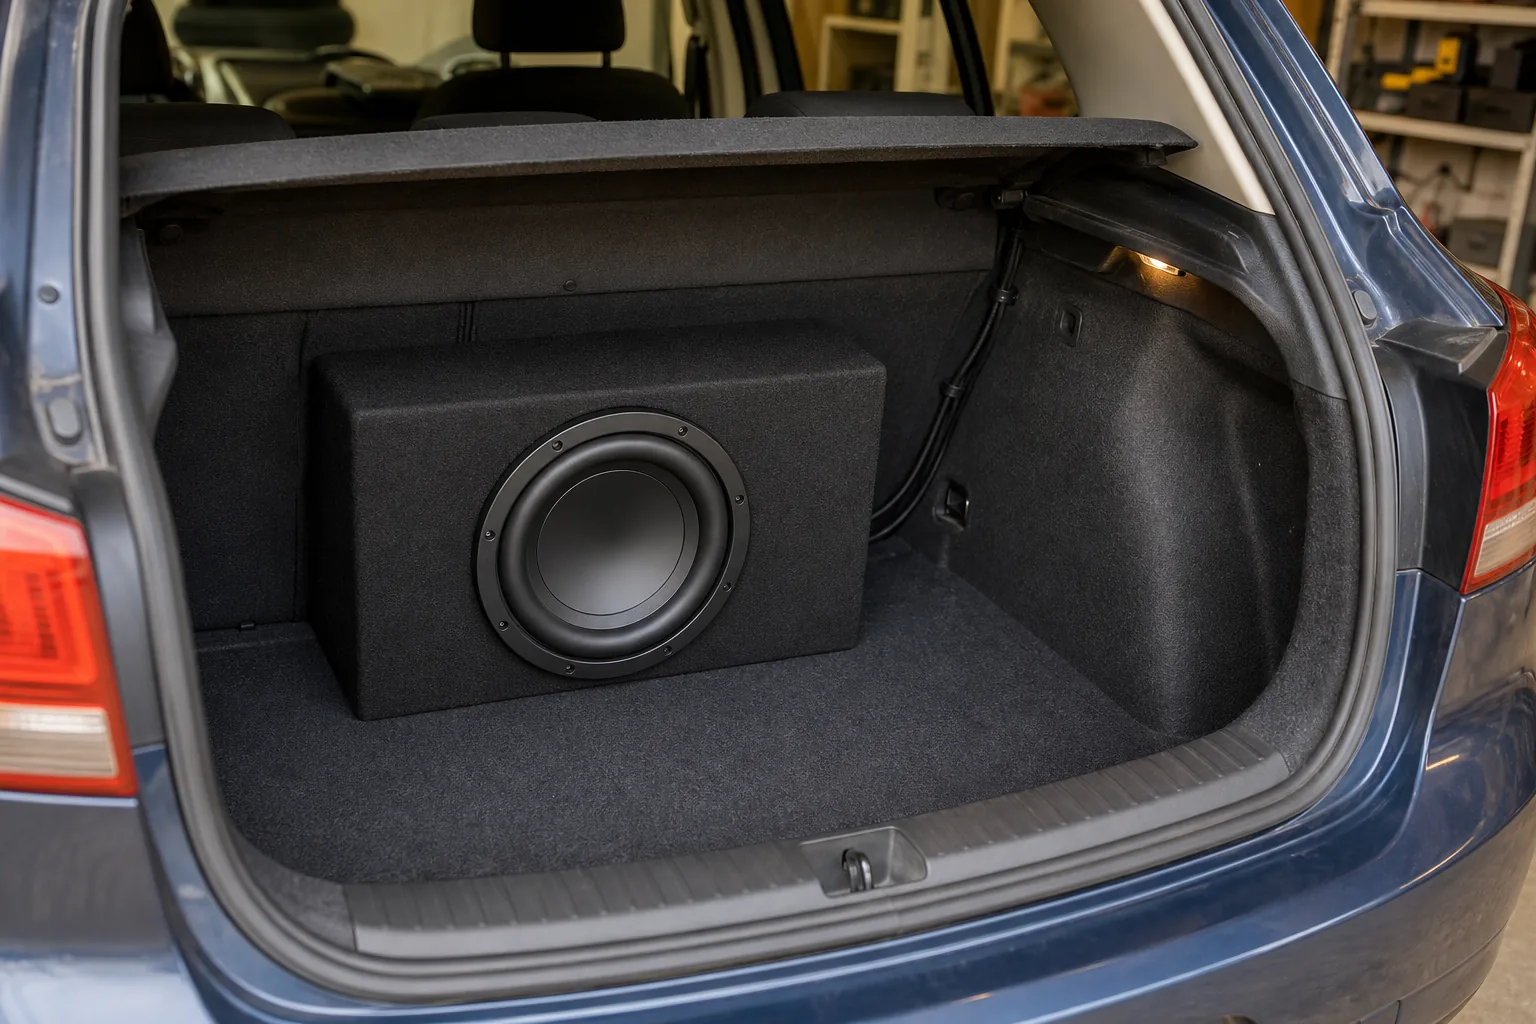
You can fit a subwoofer in a hatchback and still use the boot. The trick is choosing the right enclosure for the space you actually have, measuring the loading lip before you order anything, and wiring it properly so it does not drain your battery or hum like a broken fridge. Sealed boxes are the most space-efficient option. Under-seat active units take up zero boot space. Ported boxes deliver more output but need more room. This guide covers all three, plus the wiring steps and the legal bits you need to know.
Prerequisites
Before you buy anything, gather these.
Measurements
- Boot floor dimensions (length x width) at the widest and narrowest points
- Height from boot floor to roof liner
- Loading lip clearance: the gap between the top of the boot opening and the boot floor when the tailgate is open. This is the dimension most people miss
- Under-seat void height if you are considering an active unit (most need less than 8 cm clearance)
Tools
- Tape measure and a notepad
- Wire stripper and crimping tool
- Drill with rubber grommets (for firewall routing)
- Multimeter
- 4-gauge or 1/0-gauge power cable (see wiring steps)
- Inline fuse holder rated to your amplifier
- RCA cables long enough to reach from head unit to boot
- Ring terminal for chassis ground
- Cable ties and split loom
Legal and insurance check
- Confirm your insurer knows about the modification before you start. Multiple secondary sources describe this as necessary to avoid invalidating your cover. Check your own policy wording rather than assuming a standard position.
- Note: the Road Vehicles (Construction and Use) (Amendment) Regulations 2024 apply to England, Wales and Scotland only. Northern Ireland operates under separate vehicle regulations.
Deciding on an enclosure
Do this before you buy. The enclosure type determines everything else.
Step-by-step
Step 1: Choose your enclosure type
Sealed box
A sealed enclosure delivers tight, accurate bass with a flat frequency response and is typically about 30 per cent smaller than a ported equivalent. It suits rock, acoustic music and anyone who wants kick drums to sound like kick drums rather than a distant cannon. A standard 10-inch driver needs roughly 0.6 to 0.85 cubic feet sealed; a 12-inch needs 0.8 to 1.25 cubic feet. Always verify against your specific driver’s datasheet. These are general ranges.
Sealed is the default recommendation for UK hatchbacks. Boot space is limited, and a sealed box fits where a ported one will not.
Ported box
A ported enclosure produces higher sound pressure levels from the same amplifier power. More volume, more slam. A single 12-inch ported box typically occupies 1.5 to 2.0 cubic feet, which is roughly 25 per cent of a standard hatchback boot. That is not nothing. Leave at least 10 cm of clearance around any ports to prevent air turbulence and port noise.
If you want ported and you need boot space, a custom vehicle-specific enclosure is worth looking at. These are moulded to fit the side panels, spare wheel well or under-seat void of specific cars. Golf, Polo, Corsa, Focus, Fiesta and others are commonly catered for. No wasted corners, no rattling against flat box edges.
Under-seat active unit
An active under-seat sub integrates the amplifier into the enclosure and takes up zero boot space. Most measure less than 8 cm in height. The Alpine PWE-V80 is a compact 8-inch amplified unit with 160 W peak power, a built-in amplifier, sealed die-cast housing, variable low-pass filter and wired remote. It is listed at UK retailers including incartec.co.uk. Check current pricing at the time you order.
Under-seat units are the pragmatic choice for daily drivers where boot space is non-negotiable.
Step 2: Measure the loading lip. Do not skip this
The loading lip is the most common reason a new enclosure does not fit.
Many modern hatchbacks have a significant drop from the boot opening to the boot floor. If your enclosure is 45 cm tall but the clearance between the loading lip and the top of the boot frame is only 40 cm, you cannot get it in without stripping the interior. Measure the smallest point of entry, not just the final resting position inside the boot.
If your lip clearance is tight, go sealed (smaller box), choose a custom vehicle-specific shape, or fit an under-seat unit.
Step 3: Plan driver orientation
Orientation affects how bass builds in the cabin. Hatchbacks share one acoustic space between the boot and the cabin, which boosts cabin gain but also means the box must be physically secured.
Rear-firing is usually the best starting point for a hatchback. Sound waves travel the length of the boot and reflect off the tailgate. If the boot is particularly shallow, switch to upward-firing to prevent the driver cone hitting rear plastic trim at high excursion.
Step 4: Consider polyfill for tight enclosures
If you are building a sealed box that is slightly smaller than the ideal volume because the boot demands it, acoustic stuffing (polyfill) is a widely used technique in the car audio community. The principle is that it slows down sound waves inside the box, making the driver behave as though it is in a slightly larger enclosure. This can help preserve deep bass extension when you have had to compromise on box size. This is a commonly cited technique rather than a laboratory-verified measurement claim, so treat it as a tool to try rather than a guaranteed fix.
Step 5: Disconnect the battery and run the power cable
Disconnect the battery negative terminal first and leave it off for the entire install.
Size your power and ground cable to match the amplifier’s current draw. 4-gauge cable covers most single amplifiers up to around 1,000 W RMS; use 1/0-gauge above 1,500 W.
Connect the positive lead to the battery’s positive post and fit an inline fuse within 18 inches of the battery. Run the ground to a clean, unpainted metal point on the chassis. Sand it back if necessary. A bad ground is one of the most common causes of poor bass and electrical noise.
Step 6: Route the cables through the firewall
Find an existing firewall grommet to route the power cable into the cabin. If there is no suitable grommet, drill a hole and fit a rubber grommet before threading the cable. Never run bare cable through a bare metal hole. The insulation will chafe through over time and you will have a short.
Run the power cable along one side of the car under the sill trim. Run the RCA signal cables on the opposite side to prevent alternator whine. Routing RCA cables parallel to the power run is one of the most reliable ways to introduce hum into a system.
Step 7: Wire the remote turn-on
Run an 18 AWG blue remote wire from the head unit’s REM or P.CONT output to the amplifier’s remote terminal. This tells the amp to switch on and off with the ignition.
If your factory head unit does not have a remote output, use a relay triggered from the accessory fuse in the vehicle’s fuse box. Do not connect the remote wire to a permanent live feed. The amp will stay on with the engine off and flatten the battery.
Step 8: Set the crossover
Start the low-pass crossover at 80 Hz. This is the THX reference point for subwoofers and a reliable starting position. Adjust by ear from there. Roll it up if the mid-bass sounds thin, down if the sub is bleeding into the vocal range.
Step 9: Secure the enclosure
An unsecured enclosure is a projectile under heavy braking. The DVSA MOT Inspection Manual covers load and body security, and a heavy box loose in the boot is a concern under that category. Bolt or strap the enclosure down. Cargo straps through anchor points work well. Custom-shaped boxes that sit in the spare wheel well are self-locating, which is one more reason to consider them in a tight hatchback.
Verification
Once everything is wired and secured, reconnect the battery negative terminal.
Turn the ignition to accessory. The amplifier should power on. If it does not, check the inline fuse first. Play a bass-heavy track at moderate volume and check for hum, distortion or rattles. Confirm the amp powers off when you remove the key.
Legal position in Great Britain: fitting a subwoofer is legal. Regulation 97 of the Road Vehicles (Construction and Use) Regulations 1986 prohibits using a vehicle on a road in a manner that causes excessive noise avoidable by reasonable care. Breaches are an offence under Section 42 of the Road Traffic Act 1988, and police can take action against loud use of car stereos. Keep the volume at a level that does not draw that kind of attention and you are inside the spec sheet.
An MOT pass does not confirm road legality of a noise modification. The DVSA MOT Inspection Manual Section 7 does not include car audio as a dedicated inspection category. Do not assume a pass means you are legally covered against a Reg. 97 stop.
Troubleshooting
Box will not fit through the boot opening. You measured the internal boot dimensions but not the loading lip. Measure lip clearance before ordering. Switch to a sealed box, a custom vehicle-specific shape, or an under-seat unit.
Alternator whine or hum. RCA cables are running parallel to the power lead. Re-route them to the opposite side of the car.
Amp does not power on. Check the inline fuse within 18 inches of the battery. Verify the remote wire has a switched signal. Fit a relay at the accessory fuse if the factory head unit has no remote output.
Bass sounds boomy and slow. Ground is on painted metal. Sand the contact point back to bare metal and re-terminate.
Driver cone is hitting the rear trim. The boot is too shallow for the driver’s excursion travel in the chosen orientation. Switch to upward-firing and increase enclosure volume if possible.
Battery drains overnight. The remote wire is connected to a permanent live feed rather than a switched accessory source. Move it to a switched source.
Related notes
Northern Ireland operates under separate vehicle regulations. The GB Construction and Use framework referenced throughout this guide does not apply there without separate verification.
Insurance: notify your insurer before the install, not after. Multiple secondary sources describe this as necessary to avoid invalidating cover. Check your own policy wording for the specific obligation. This is not a one-size position.
If you are working with a factory head unit that lacks preamp outputs, a line output converter (LOC) lets you tap a signal from the speaker outputs. This is a common workaround for OEM head units and is worth researching before assuming you need a full head unit replacement.
Keep receipts for your components. If you ever need to make a claim or demonstrate the install to an insurer, documented parts help.