
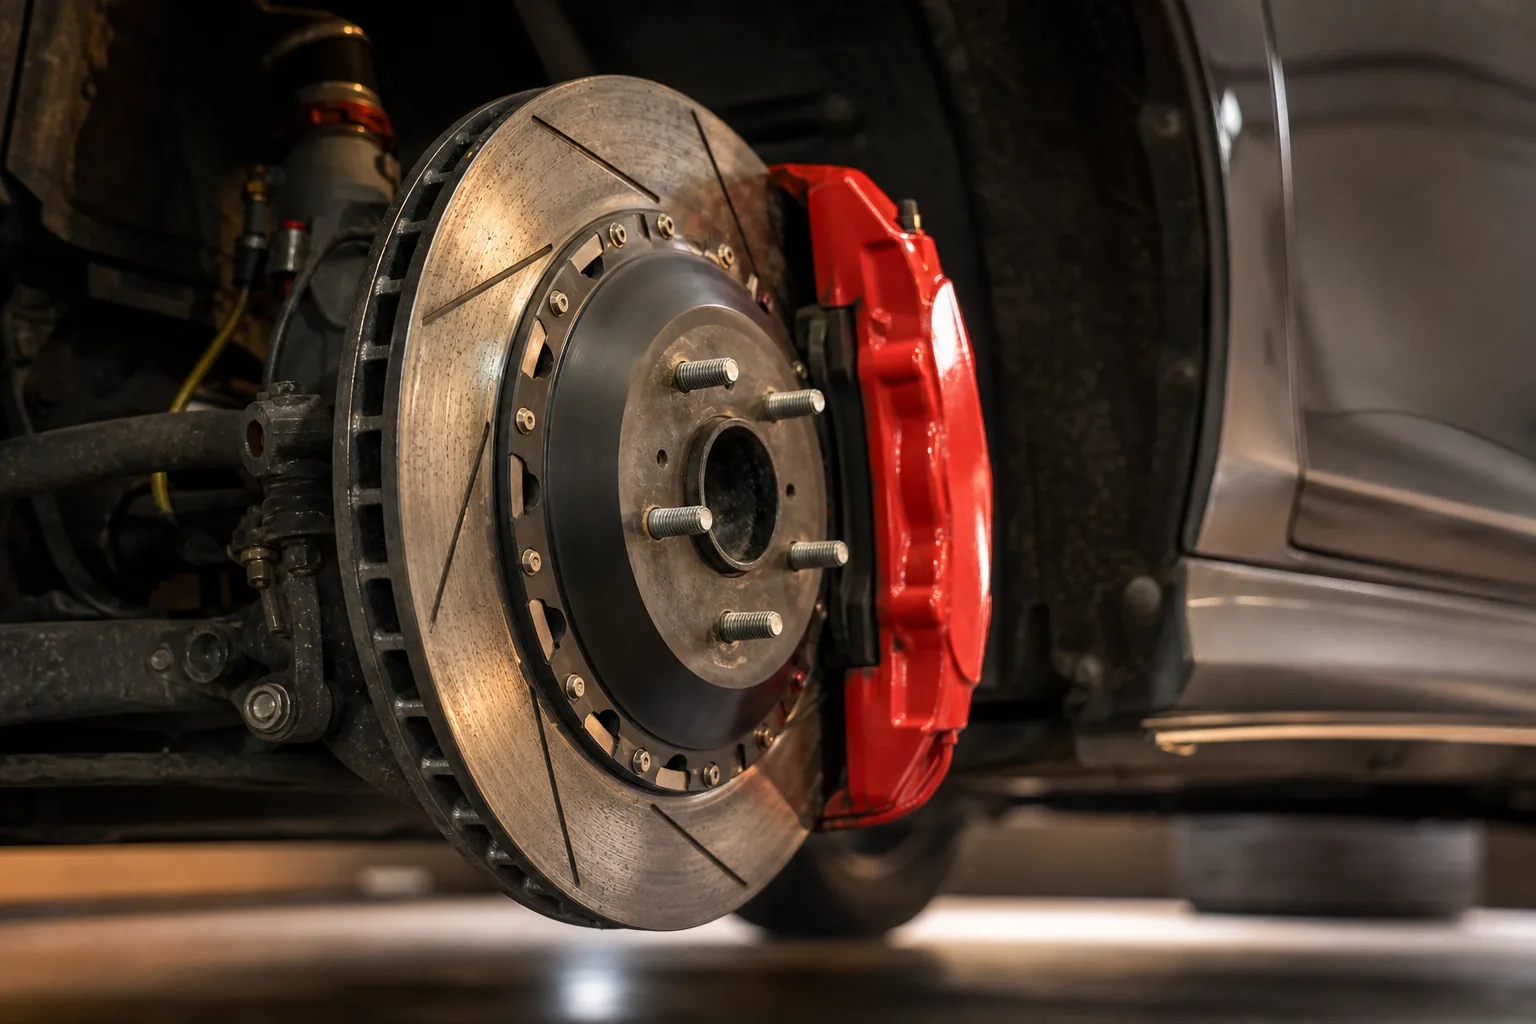
Sort the brakes first
Every serious builder knows the order: brakes, then power. If you are planning any power upgrade, whether that is a remap, a turbo or even just a cold air intake, your stopping ability needs to be ahead of it. More power means higher speeds and more kinetic energy to scrub off. Standard pads and ageing fluid were not sized for that.
This guide covers the practical upgrade sequence: what to inspect, what to swap, and what the law says about each step.
Prerequisites
Before you buy anything, have these in order.
- The car is mechanically sound. No binding calipers, no seized sliders, no fluid leaks.
- You know your car’s build date. R90 pad approval is only required on cars registered after 1999, under SI 1999/2978. Cars built before that date are not subject to that regulation, but you still need pads that are fit for purpose. Note: the exact wording of this regulation should be verified directly at legislation.gov.uk before relying on it.
- You have checked your insurance. Any brake component change should be declared to your insurer. Do not assume silence equals cover.
- You have the manufacturer’s minimum disc thickness figure for your car. This is not the same as the MOT limit. The MOT uses a visual and performance standard, not a precise millimetre figure. A disc can be below the manufacturer’s recommended thickness and still pass an MOT, but that does not mean it is safe to use as a base for a performance build.
- If you are in Northern Ireland, your MOT is administered by the DVA, not the DVSA. Check the NI rules separately before assuming the same process applies.
Tools you will need: torque wrench, brake caliper wind-back tool (piston type varies by car), brake cleaner, fresh copper grease or ceramic brake lubricant, a brake fluid bleeder kit or a willing assistant, and a container for old fluid.
Steps
1. Inspect what you have
Start with an honest assessment. Pull each wheel and look at the pads and discs.
The UK legal minimum pad thickness is 1.5 mm. A pad at or below that figure during an MOT is a fail. Most manufacturers and garages recommend replacing at 3 mm, which protects the disc and gives you a sensible margin. If your pads are anywhere near 3 mm and you are planning power work, replace them now rather than at the next service.
For discs, look for deep scoring, heat-check cracks, or obvious warping. A major MOT failure for discs covers a disc that is significantly and obviously worn, deeply scored, or contaminated with oil or grease, or where braking effort on one wheel is below 70 per cent of the other across the axle. A dangerous failure includes a disc that is fractured or otherwise likely to fail. Do not build on top of a disc in that condition.
2. Choose your pad compound
This is the highest-value upgrade for the money. Swapping to a higher-temperature compound such as EBC Yellowstuff or Ferodo DS2500 delivers an immediate improvement in resistance to fade under hard or repeated braking, without requiring a full big brake kit.
OEM pads are designed for average use in average temperatures. When you push a car hard, pad temperatures rise quickly. Pad fade occurs when the friction material can no longer grip the rotor effectively at elevated temperatures. Fast-road compounds are formulated to resist this across a much wider thermal range.
One legal point: if your car was registered after 1999, replacement pads fitted to a standard braking system must carry R90 approval. R90 sets both minimum and maximum performance limits, and pads will not pass R90 if they are more than 15 per cent more effective than the standard pads. However, if you have already upgraded to non-standard calipers or discs, the R90 requirement does not apply in the same way. Verify the R90 status of any pad directly with the supplier for your specific build date and setup.
Do not assume a brand name means R90 compliance. Check the product listing against your car’s registration date.
3. Replace the discs if they need it
If the existing discs are in good condition and within the manufacturer’s minimum thickness, you can reuse them with new pads. If they are worn, scored or cracked, replace them at the same time.
Upgraded discs are available in dimpled, grooved or slotted form. These can be lighter than stock equivalents and help clear heat and gases from the pad-to-disc interface. Larger diameter discs offer a greater surface area, which helps keep temperatures down and allows the pad to bite with more force.
For track use specifically, slotted discs are generally preferred over drilled. Drilled holes can become stress risers under sustained high-heat cycling, which makes them a risk for anything beyond occasional spirited road use. Do not let anyone sell you drilled discs as universally superior for track work.
4. Fit stainless steel braided lines
Rubber brake hoses expand slightly under pressure. That expansion is felt as vagueness in the pedal. Stainless steel braided lines do not expand in the same way, which gives a firmer, more consistent pedal feel. Pairing upgraded pads with braided lines and high-temperature fluid is a recognised fast-road setup.
Check that any braided lines you purchase are approved for road use and are the correct length for your car. Fitting the wrong length can cause lines to snag on full lock or full droop.
5. Flush and upgrade the brake fluid
This step is non-negotiable before any track use, and worth doing before serious road modifications too. Brake fluid absorbs moisture from the air over time, which lowers its boiling point and accelerates corrosion inside the system.
DOT 4 has a minimum dry boiling point of 230 degrees C and a wet boiling point of 155 degrees C. DOT 5.1 has a minimum dry boiling point of 260 degrees C and a wet boiling point of 180 degrees C. Both are glycol-based and compatible with each other, though a full flush gives the best result. Some premium DOT 4 fluids actually exceed the DOT 5.1 minimums, so read the actual product specification rather than just going by the rating on the label.
Fluid fade happens when brake fluid boils inside the caliper, creating compressible gas bubbles. When that happens, the pedal either goes rock hard with almost no braking effect, or goes long and soft. Either way, you are not stopping the car properly. Upgraded fluid addresses this.
One critical warning: DOT 5 is a silicone-based fluid and is entirely incompatible with DOT 4 and DOT 5.1. It cannot be used as a drop-in upgrade. Mixing silicone DOT 5 with glycol-based fluid creates a compressible mixture that will cost you brakes when you need them. Do not do it.
Flush the fluid before each track season. Consider a mid-season flush if you are running multiple events.
6. Bed the pads in correctly
New pads need bedding in. Skipping this causes green fade, which is early-life brake fade caused by outgassing from the friction material before it has properly transferred a thin layer onto the disc. It feels like the brakes have stopped working. They have not, but it is alarming and avoidable.
Follow the bedding-in procedure supplied by your pad manufacturer. EBC and Ferodo both publish specific procedures on their websites. The general principle involves a series of progressively harder stops from moderate speed, allowing the brakes to cool between each one. Do not head into a full track session straight out of the box.
Verification
Once everything is fitted, check the following before any spirited use.
- Pedal feel is firm and consistent. No sponginess, no excessive travel.
- No fluid leaks at any caliper, line or bleed nipple.
- Discs are seated correctly and rotate without catching.
- Braking effort is balanced across each axle. A significant imbalance is an MOT major failure and a handling hazard.
- If you are heading to a track day, scrutineering will typically check disc condition and pad thickness. Requirements vary by organiser and circuit. Check the specific event regulations in advance.
An MOT pass does not confirm that a modified braking system is road-legal. Those are two different standards. Declare changes to your insurer.
Troubleshooting
Spongy pedal after bleeding. Air is still in the system. Bleed again, starting from the furthest caliper from the master cylinder. Check that bleed nipples are fully closed between strokes.
Vibration or judder under braking. Most commonly a warped disc or uneven pad material transfer during bedding. If the discs are new, repeat the bedding procedure properly. If the discs are old, they may need replacing.
Fade on first hard use. If you skipped the bedding procedure, this is likely green fade. Allow the brakes to cool completely and follow the manufacturer’s bedding steps before trying again.
Fluid boiling (long or rock-hard pedal under sustained braking). You need higher-temperature fluid and possibly upgraded pads. If this is happening on the road, your braking is not safe for the way you are using the car. Upgrade the fluid before the next outing.
Uneven braking across an axle. Check for a seized caliper piston or slider, contaminated pad or disc, or a leaking caliper. This is a fail condition under the MOT inspection standards and a genuine safety issue.
Related notes
Brakes are the foundation of any performance build. Get them right and everything else makes more sense. Get them wrong and more power just means you arrive at the problem faster.
If you are building a track-only car, the road-legality points in this guide do not apply in the same way. Be honest with yourself about what the car is. A setup that makes sense for a dedicated track car is not automatically legal for road use.
For road cars, the upgrade order is: brakes, tyres, suspension, then power. Condition and maintenance should always come before chasing horsepower. That is not a conservative take. That is how builds last.
If you are looking at the other end of the audio chain, see how to upgrade your car speakers without changing the head unit.